

To enhance customer interaction on your website, you can integrate Facebook Messenger Live Chat, a plugin provided by Facebook. This feature allows visitors to directly engage with your business on your website. By embedding the Facebook Messenger Live Chat through HTML code, you can seamlessly continue conversations with customers even after they have left your website. Follow the steps below to integrate this live chat solution onto your web pages.
Setting Up Facebook Customer Chat
Step 1: Open your Facebook page
Firstly, ensure that you have a Facebook page. If you don’t already have one, create a page here. If you already have a page, log in and open it.
Step 2: Open Messaging under Page Settings
Access the Settings tab on your Facebook page and navigate to the Messaging section. This is where you can configure the Messenger settings for your website. Refer to the following images as a visual guide:

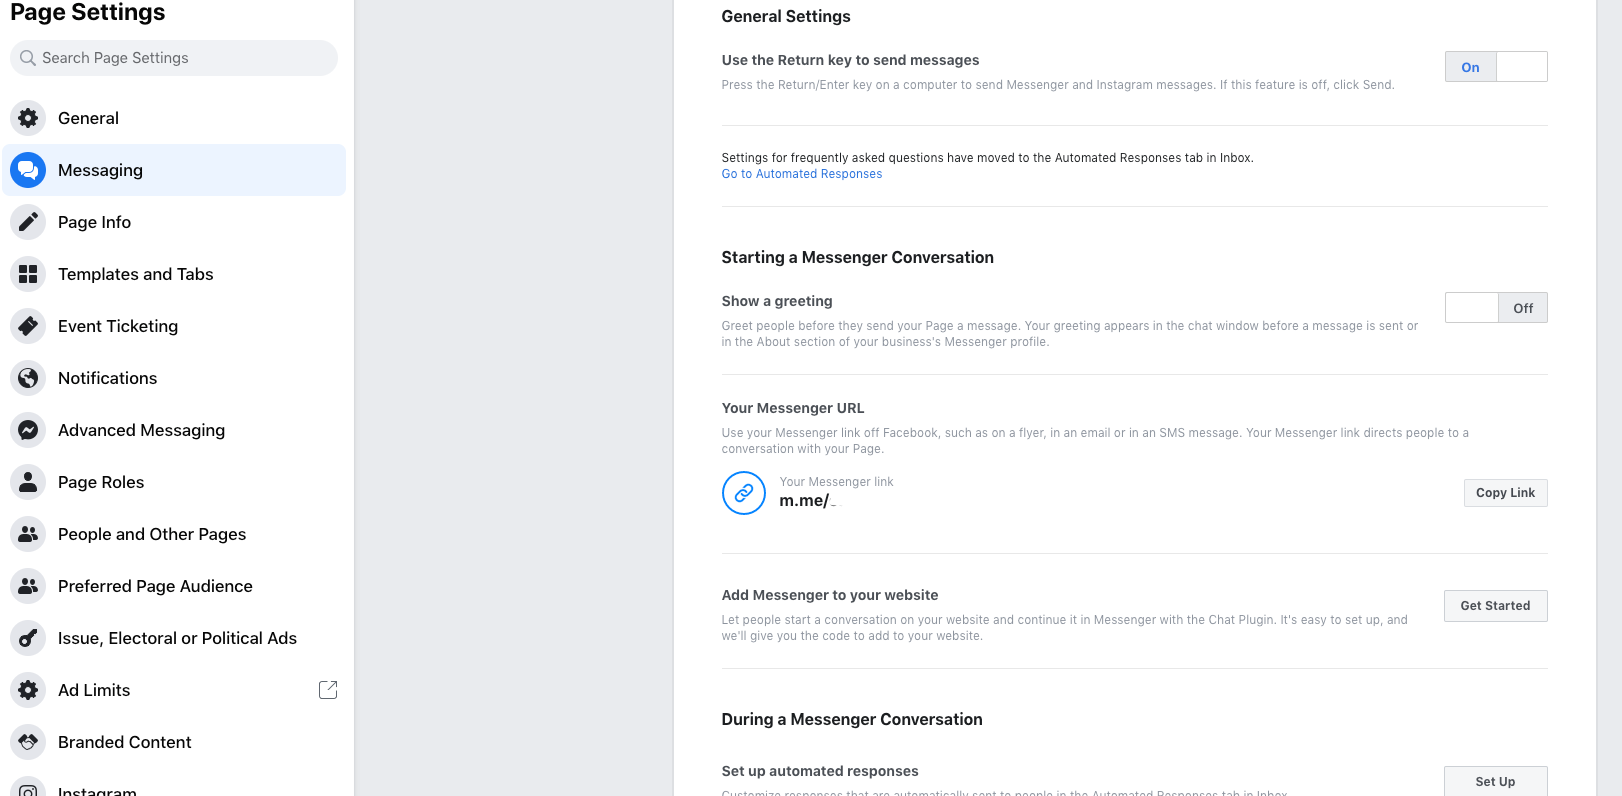
Step 3: Go to the "Add Messenger to your website" section
Scroll down until you find the Add Messenger to your Website section, then click the Get Started button.

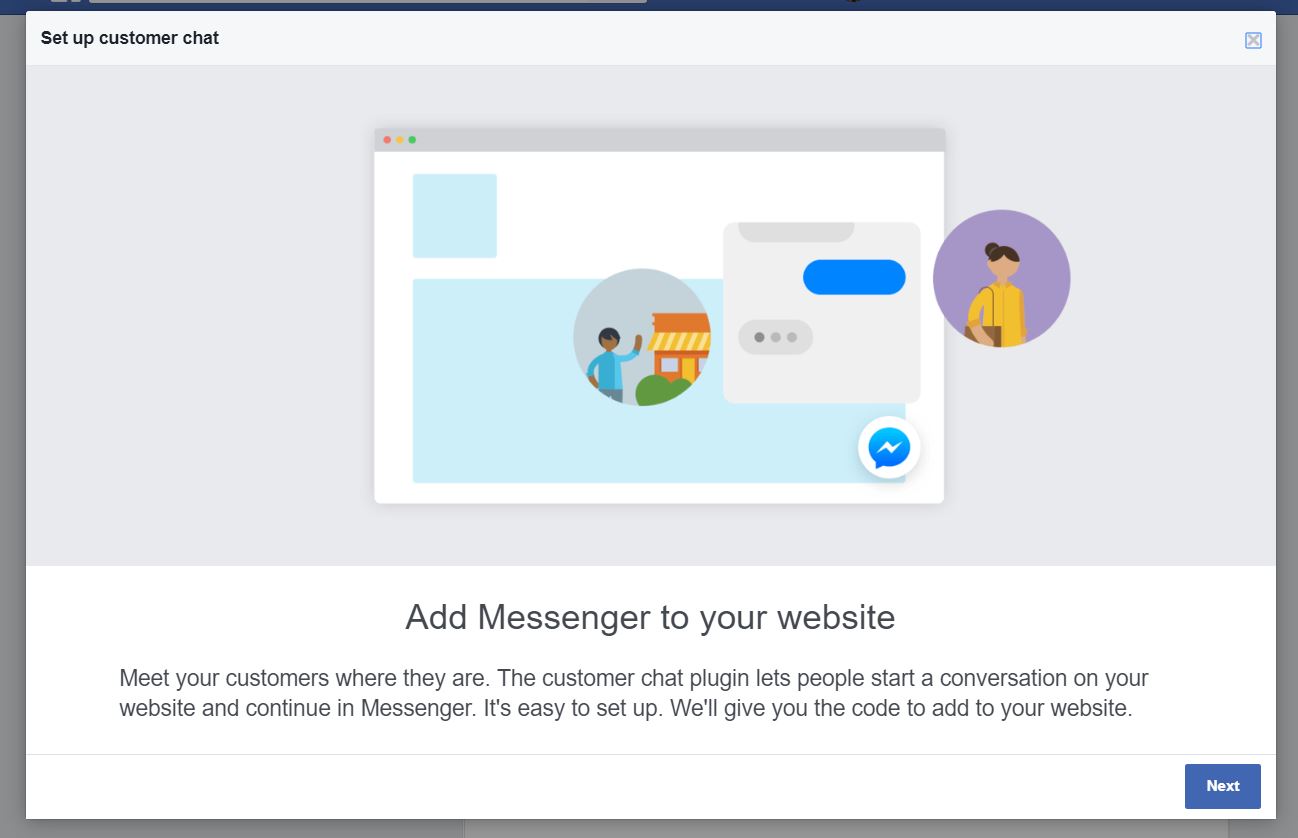
Step 4: Set up Customer chat language & greeting
A dialogue box will appear, providing a brief introduction to the Customer chat plugin. Click Next to proceed.
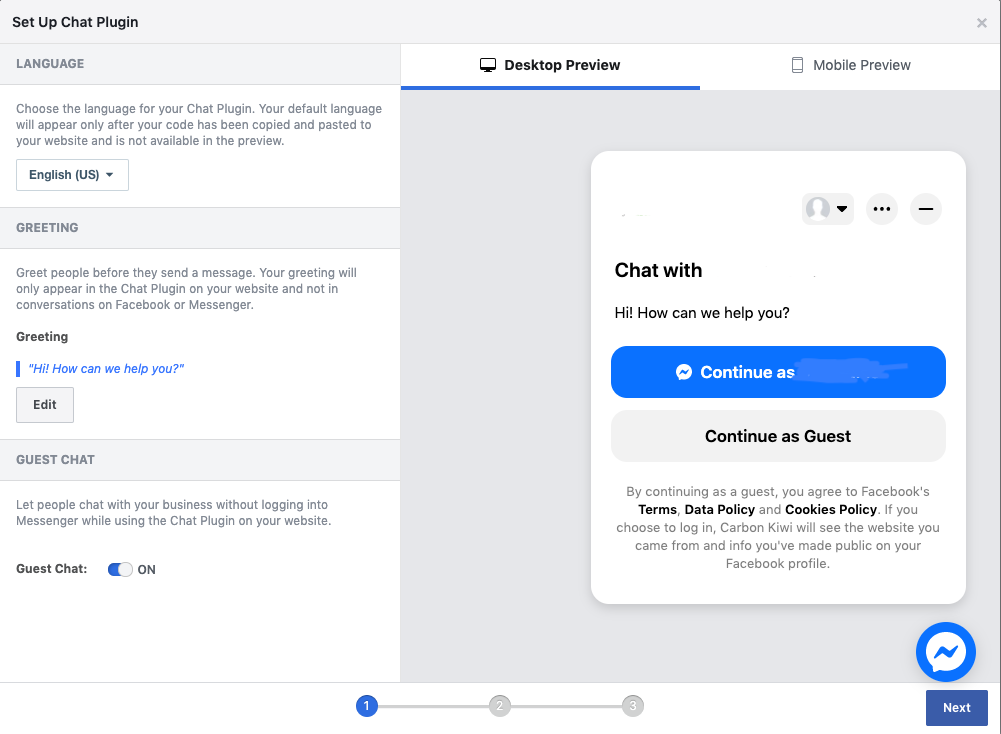
On the next page, you can modify the default language and customize the greeting that visitors will see before initiating a chat on your website. A preview on the right side of the page will show you how it will appear. Once you’re satisfied, click Next.
Step 5: Set up Customer chat appearance
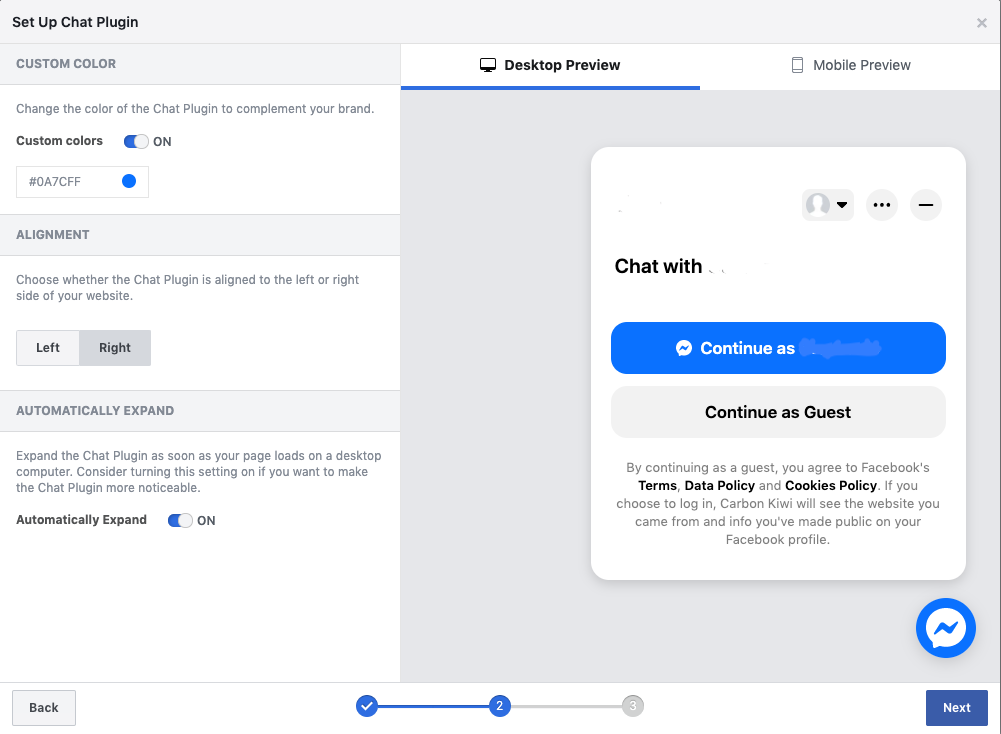
After clicking Next, you will be presented with another page where you can configure the appearance, including the color, alignment, and automatic expand settings for the customer chat. Consider selecting a color that matches your brand or website. Once you’ve made the desired adjustments, click the Next button.
Step 6: Set your website domain names
Enter your website domain names. Include both the HTTP:// and HTTPS:// variants to ensure compatibility for all users. Don’t forget to click Save. For Rocketspark users, set your primary domain name as your domain by going to Dashboard -> Domain Names. Remember to add "www" in front of it, for example, ‘https://www.myprimarydomain.com‘.
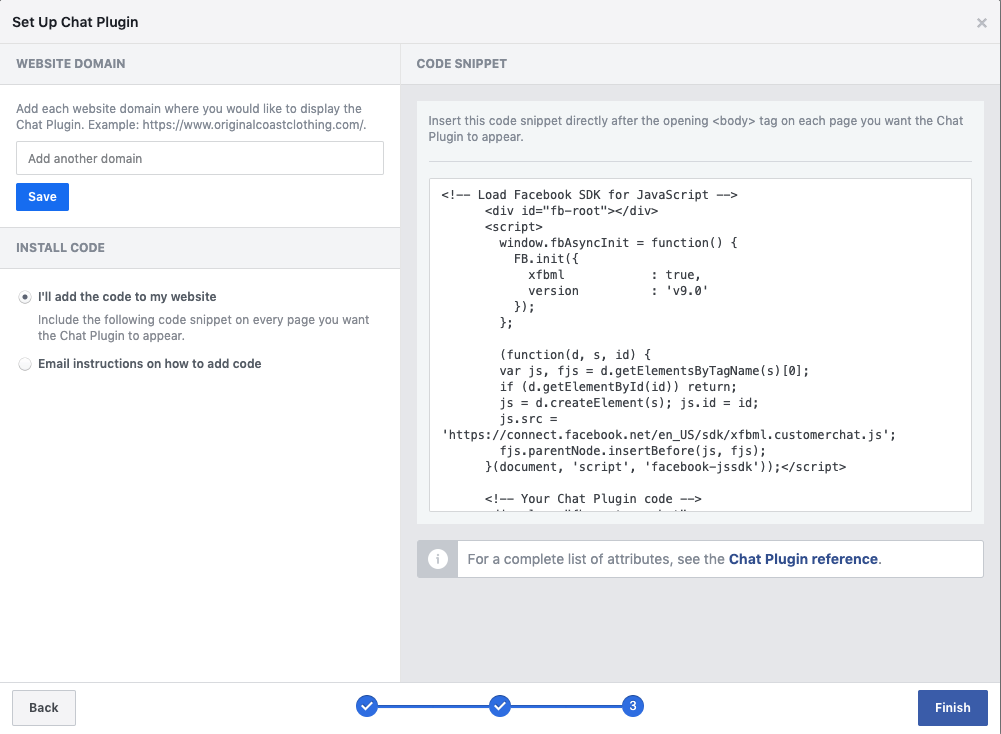
Step 7: Copy the generated code
Facebook will provide options for code installation. You can either install the code yourself or email the instructions to your developers.

Step 8: Log in to your WordPress or Webflow dashboard
Step 9: Go to the "Get Found Online (SEO)" page
In the side navigation panel of your dashboard, click on the Get Found Online (SEO) menu. If the side navigation panel is not visible, click the hamburger menu (three-line button) located at the top left corner of your dashboard.
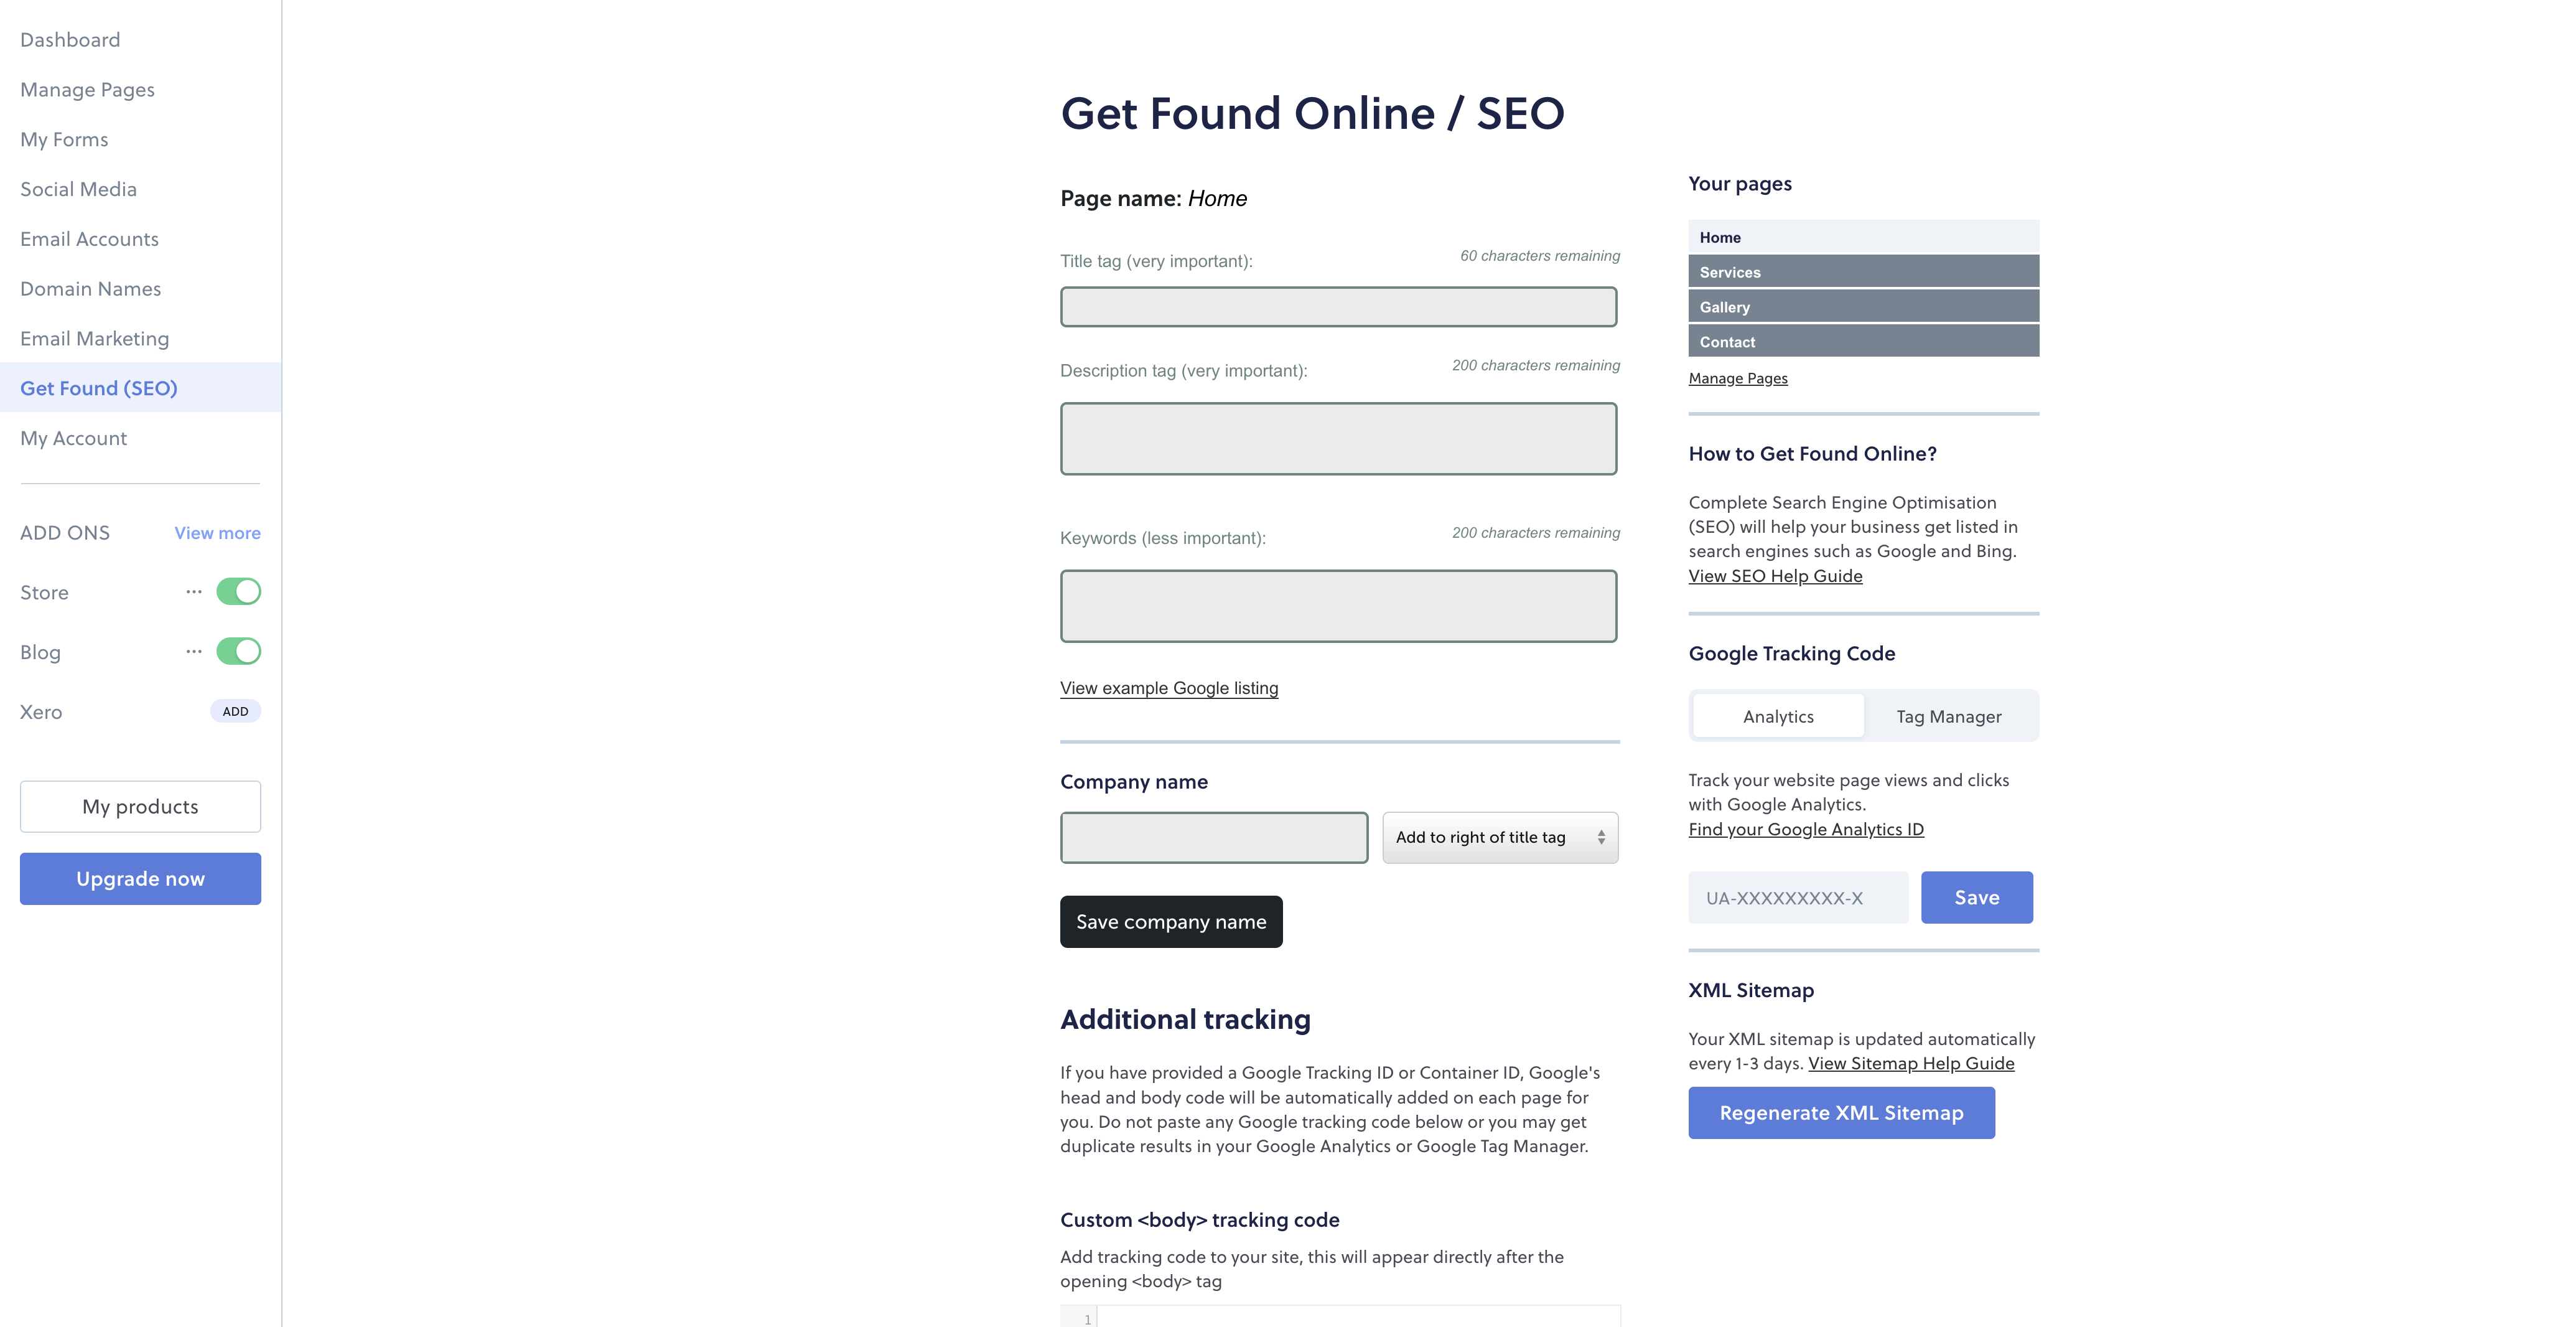
Step 10: Paste the Facebook Customer Chat snippet code
Scroll down the page until you reach the Additional tracking section. Paste the copied code into the Custom tracking code text area and ensure that you click the Save button.
Step 11: Test it out!
To verify the implementation, log out from Facebook and visit your website using the domain name you set in Step 6 above. The Facebook chat will only appear when you are logged out.
Follow these steps, and you’ll successfully integrate Facebook Messenger Live Chat into your website, improving customer engagement and support.


